So there is this thing floating around the blog world right now called the Pinterest Challenge. A few girls, including them on Young House Love (a blog I read) decided to set a challenge where they actually had to make something that they had pinned on Pinterest. Stop-pinning-start-doing type of idea.
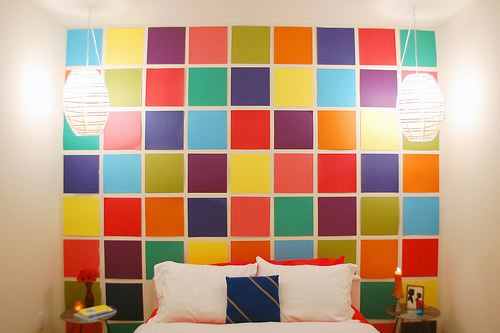
Scott and I just finished a project that I originally saw on Pinterest so it fits the brief! We are thrilled with the way it came out.
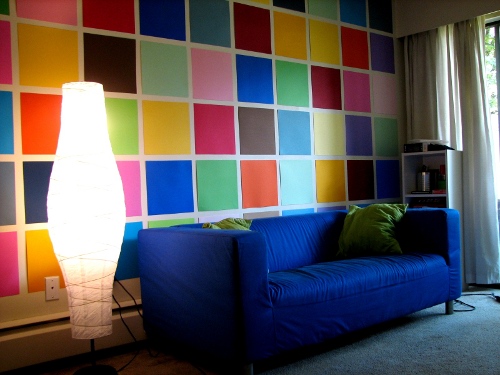
This was my inspiration:
Unfortunately there weren’t any instructions, so we struggled a bit at first with getting ours to work but still managed to finish in one day, so that’s pretty good. Here is my tutorial:
Things you need:
- 12″x12″ scrapbook paper (I needed 66 papers)
- masking tape
- some kind of level
- scissors
- something to make the gaps uniform (ruler, cardboard strip, etc.)
First thing I did was rip open the pack of paper and lay out the squares in the order I wanted (random) on the ground. I wanted it to be somewhat balanced and definitely not two of the same colour touching each other.
The part I was most concerned about was getting the squares level, because i thought you would be able to tell if it was crooked in real life. We didn’t have a level so I started off just measuring it off the floor and ceiling. Unfortunately it seems nothing in our apartment if square, flat or level, so that was annoying.
A laser level would most definitely be the best tool, but those were too expensive so we just bought a regular long level. Made of plastic… total garbage… will return this week.
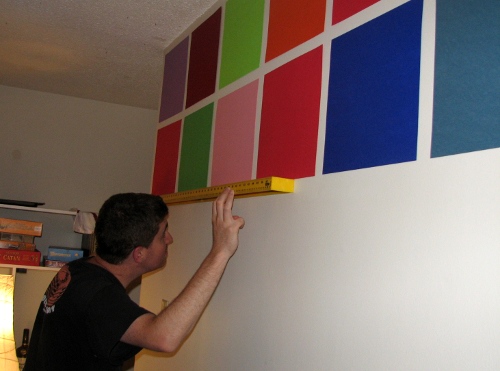
I originally planned to have the gaps in between the papers be 1″, but the level itself was 1.25″ and it was a lot easier to just go with that, so we could hold the level against the ceiling/bottom of the papers, make it level, and then trace a line on the bottom edge of the level. Scott held the level and then I squeezed in and drew the line.
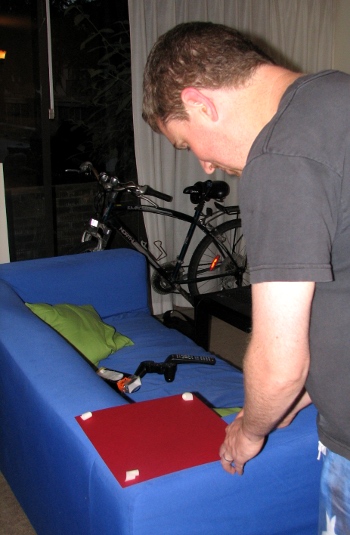
Then Scott attached four loops of masking tape on the back.
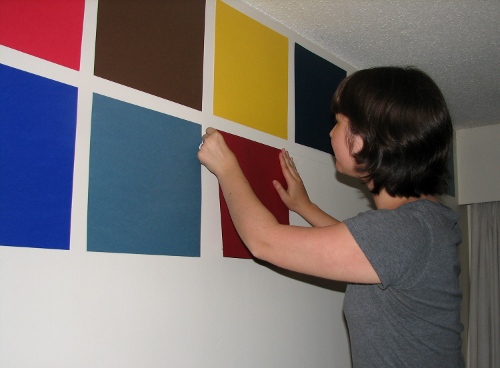
And then I lined the top edge up with the pencil line, and the right sized gap on the sides. At first I used a ruler that was also 1.25″ wide as a guide, but after the first row I just eyeballed it. And it looks even to me! I erased the pencil as I went along.
I had to cut around the light switch and plugs, which was pretty annoying. Please don’t look too close at them, haha.
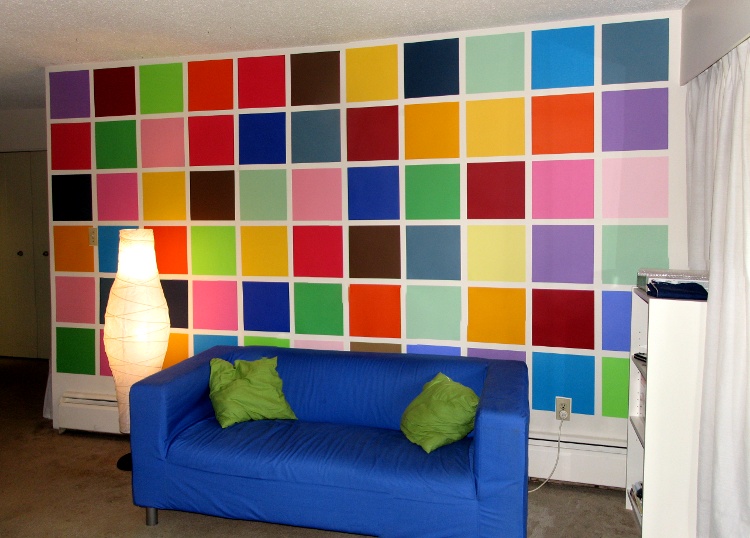
All done. I love it! I can’t help but keep seeing that optical illusion with the black blobs in between the corners of the paper. Definitely livens up our otherwise beige apartment!
Add me on Pinterest if you want: http://pinterest.com/jornakat/